
Basics of helicopter flight
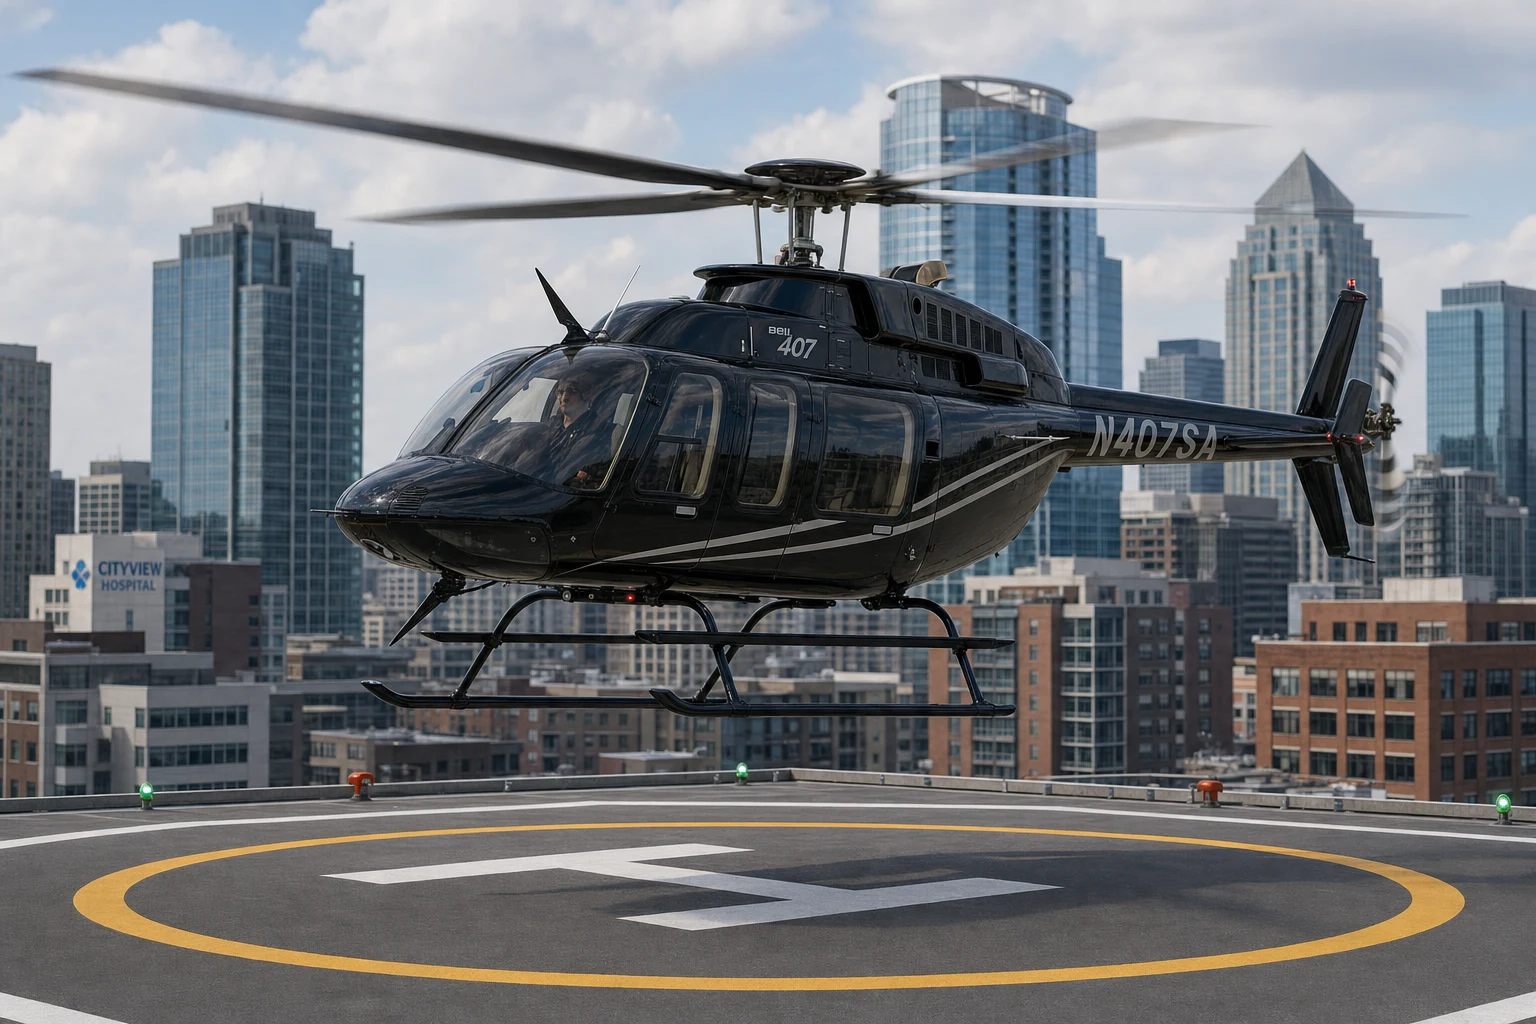
Learning to Fly Helicopters in a Flight Simulator
If you already fly aeroplanes in a simulator, you have a solid foundation for helicopters. Navigation, radio work, instrument scanning and situational awareness all carry over. What's new is how the controls behave and how they interact with one another. This tutorial follows the sequence real flight training uses, introducing each control in forward flight before bringing them together in the hover. Whether you fly a Cabri G2, Bell 407, R22 or H135, the same principles apply.
Why the hover comes last
An aeroplane, once trimmed, tends to hold its attitude. A hovering helicopter is dynamically unstable: a small drift, left alone, develops into a swing that grows with each cycle. Holding a hover means making continuous small corrections, much like balancing a broom upright on your palm.
In the hover, all four controls affect one another at once, and there's no airflow over the airframe to add stability. Above about 20 knots of forward speed, the helicopter becomes considerably more stable and the controls behave in a way that will feel familiar to an aeroplane pilot. That's why real training usually introduces the controls in forward flight first, and moves on to the hover once the student understands what each control does and which other controls it affects.
Simulator pilots also work without two cues a real pilot relies on: feeling drift through the seat and seeing ground movement in peripheral vision. Drift becomes visible slightly later on a monitor, so corrections come slightly later too. Plan for the hover to take several hours of practice. Real students take hours to learn it as well, with an instructor alongside.
The four controls and how they interact
A helicopter has four controls. Each has a primary job and a secondary effect on something else. Understanding both is the key to smooth flying.
Cyclic
The cyclic is the stick between the pilot's knees, and your joystick in the simulator. It tilts the rotor disc, the circle swept by the main blades. Rotor lift acts at right angles to the disc, so tilting the disc forward directs part of that lift forward and the helicopter moves forward. Tilt it left and the helicopter moves left, in the same way an aeroplane turns by tilting its lift in a bank.
The rotor responds to the cyclic first, and the fuselage, hanging beneath it like a pendulum, follows after a short delay. If you add more input while waiting for the fuselage to respond, the result will be larger than intended, and correcting in the other direction with the same delay produces a rocking motion. The solution is small inputs, made early, and then removed before the helicopter has finished responding.
You may read about gyroscopic precession, which describes how a spinning rotor responds to an input about 90 degrees later in its rotation. It's a real effect, but the manufacturer has already accounted for it in the control rigging, so pushing the stick forward tilts the disc forward. No compensation is needed from the pilot.
Collective
The collective is a lever beside the pilot's seat, operated with the left hand. It changes the pitch angle of all the main rotor blades together, hence the name. More pitch gives each blade a bigger bite of air and more lift, so the helicopter climbs. Less pitch and it descends.
Although most home setups use a throttle lever for the collective, it isn't a throttle. The rotor turns at a nearly constant speed, and the collective changes how hard the blades bite. Raising it sets off a chain of effects:
- More blade pitch produces more lift, and also more drag on the blades.
- That drag would slow the rotor.
- The engine governor adds power to hold rotor speed constant.
- More power means more torque twisting the fuselage.
- The nose yaws.
Understanding this chain lets you anticipate the pedal input rather than memorise it. Each time the collective goes up, the nose tends to swing one way. Each time it comes down, the nose swings the other.
Anti-torque pedals
The engine turns the main rotor in one direction, and the reaction tries to turn the fuselage in the other. On most helicopters, the tail rotor counteracts this. It's a small, sideways-thrusting propeller at the end of the tail boom, and the pedals change the pitch of its blades. Press one pedal and the tail rotor pushes harder, swinging the nose one way. Press the other and it pushes less, letting torque swing the nose the opposite way.
The pedals resemble an aeroplane's rudder pedals, but they work at zero airspeed because the tail rotor generates its own airflow. This also means the tail rotor draws engine power. Increasing tail rotor thrust raises the total power required, so with the collective unchanged, the helicopter may sink slightly. If a hover turn climbs or descends on its own, a small collective adjustment alongside the pedal input will correct it.
Which pedal you need depends on the main rotor's direction of rotation, which varies by manufacturer:
- Bell, Robinson and Sikorsky rotors turn anticlockwise viewed from above. Adding power swings the nose right, so you need left pedal.
- Airbus and Eurocopter types, from the Aérospatiale lineage, turn clockwise and need right pedal.
To check any helicopter, sit on the ground with the rotor at full speed and raise the collective very gently until the helicopter feels light on its skids. Note which way the nose wants to move. The opposite pedal holds it.
Throttle and rotor RPM
In an aeroplane you select the power. In a helicopter, rotor RPM is held almost constant, and in most simulator helicopters a governor manages this for you. You bring the throttle up to its flight setting during start-up and then generally leave it there. Lift is controlled with blade pitch, not rotor speed.
Two points are worth knowing:
- Wait for flying RPM. Raise the collective only once the rotor has reached flying RPM after start-up. Before that, you'll get a low-RPM warning horn and little useful lift. Start-up procedures vary between types and are worth reading up on for your chosen helicopter.
- Avoid overpitching. Pulling more collective than the engine can support lets blade drag pull rotor speed down, and lift reduces with it. Light piston helicopters are particularly sensitive to this.
How the controls work together
Raising the collective needs pedal. Pressing a pedal changes your height. Pushing the cyclic forward tilts lift away from vertical, so you need a little collective to hold altitude. Flying a helicopter smoothly is largely a matter of making the second input as you make the first.
Setting up your controls
A well-configured setup makes learning considerably easier. Work through these before your first flight.
Collective axis direction. In the controls menu, confirm that moving your lever back or down lowers the collective. A reversed axis means the helicopter starts with full blade pitch.
Joystick centring spring. A real cyclic stays where you leave it, held by friction or a force-trim system. Most joysticks spring back to centre, but the hover position of the cyclic is rarely at centre (see translating tendency, below). Depending on your hardware, you may be able to remove the spring, or use the simulator's cyclic trim or force-trim feature (names vary between simulators). Dedicated helicopter hardware, from collective levers to modified sticks, is a subject in its own right.
Yaw axis. If you use the twist of your joystick grip for the pedals, twisting can introduce small pitch and roll inputs. In aeroplanes this rarely matters, but in the hover you'll use the pedals constantly, so rudder pedals or a separate yaw axis make a noticeable difference. If you only have a twist grip, a small deadzone on the twist axis helps keep it separate from the cyclic.
Sensitivity and response curves. The cyclic's delayed response can feel sluggish, but increasing sensitivity tends to speed up oscillations rather than remove them. A gentle response curve, which softens small inputs near centre, usually works better. Keep deadzones very small, because hover corrections are tiny.
Frame rate. Hovering is a continuous cycle of seeing and correcting, so any delay between input and display makes it harder. Reducing scenery and traffic settings for helicopter practice is worthwhile.
View. Use a consistent cockpit camera position each flight, so your judgement of height and drift calibrates to the same picture. A wider field of view or head tracking recovers some peripheral vision, and VR adds depth perception.
Assists. Yaw and stability assists are valuable learning tools, covered below. They work by removing some of the coupling between controls, so it helps to know what each one does.
Helicopter flight models also vary between simulators, and between default and add-on helicopters in the same simulator. X-Plane has a strong reputation among rotorcraft enthusiasts, and some third-party helicopters are well regarded, though that's community opinion rather than measurement. Ground handling, particularly skids on tarmac, is modelled better in some simulators than others.
Stage 1: Forward flight at altitude
Begin your session in the air, at around 1,000 feet above the ground and 60 to 80 knots, well clear of terrain. At this speed the helicopter behaves much like an aeroplane:
- Cyclic attitude sets speed. Lower the nose slightly to accelerate, raise it to slow down.
- Collective sets climb or descent. Raise it to climb, lower it to descend.
- Pedals keep the slip ball centred, as the rudder does in an aeroplane.
Fly gentle turns, climbs and descents. Each time you move the collective, watch the slip ball and the nose, and add the pedal that keeps them steady. This builds the most useful reflex in helicopter flying, pedal with collective, at a height where there's plenty of margin.
Next, slow down while still at altitude. Somewhere between 16 and 24 knots, depending on type and weight, you'll pass through effective translational lift. Above that speed, the rotor moves out of its own downwash (the column of air it pushes down) and into clean air, which makes it significantly more efficient. As you slow below that speed, you'll typically feel a shudder, and the helicopter will begin to sink unless you add collective, along with the pedal that goes with it. Practise this transition several times. It's the same transition you'll fly at the end of every approach.
You can bring the helicopter close to a stop at altitude to get a sense of the power required, though a high hover is harder than a low one, because there's no nearby ground to judge drift against and no ground effect (explained below).
Stage 2: Adding the controls one at a time
Instructors often share the controls with a new student: the student flies the cyclic while the instructor handles pedals and collective, then the student takes on each additional control in turn. You can recreate this with the simulator's assists.
Most simulators, and some add-on helicopters, offer a yaw assist or stability augmentation, though names and behaviour vary. A useful progression:
- Cyclic only, with yaw assistance on.
- Cyclic and pedals, with assists reduced.
- All controls, with assists off.
Each time you reduce an assist, expect the hover to need some readjustment as the coupling between controls returns. Aim to work through to flying without assists, so your skills match how the helicopter actually behaves. The same applies to helicopters with real stability augmentation and autopilots, such as the H135, H145 or S-76. Hand-flying them with augmentation off is a separate skill worth developing.
Choosing a helicopter to learn on
A mid-size turbine single such as the Bell 407 or an H125-class helicopter has a governor managing rotor speed and a heavier rotor that responds more gradually, which makes it a comfortable machine to learn on. The R22 is a real-world trainer, but its light rotor responds quickly, so it's better suited to once you're comfortable with the basics.
Stage 3: The low hover
Hover low: a few feet up, with the skids at roughly knee height to someone standing beside you. At this height you benefit from ground effect. The ground restricts the rotor's downwash, reducing the power needed to hover. The effect is strongest within about half a rotor diameter of the surface and mostly gone by one full diameter. A small two-seat trainer has a rotor roughly 7 to 8 metres across; a Bell 407 or H135 is around 10 to 11 metres. This is why a collective setting that holds a hover at 3 feet won't hold it at 30 feet.
Translating tendency. The tail rotor's sideways thrust pushes the whole helicopter sideways. To stay over one spot, you hold a small, constant sideways cyclic input, and on many types the helicopter hovers with one skid slightly lower than the other. With a spring-centred joystick, this means holding a steady input against the spring, which is where cyclic trim helps.
Where to look. Pick a reference point well ahead rather than watching the ground just in front of the nose, which exaggerates every movement. Hover over textured ground with clear markings, such as grass, pad markings or helipad edges, so small movements are easy to see. An external or chase view is a useful way to spot drift early while you learn; aim to transition to the cockpit view as your hover develops.
Making corrections. Real hover corrections are often a centimetre or less of cyclic movement, and on a joystick the equivalent is smaller still. Make a small input early, then take it out before the helicopter has finished responding. If the helicopter is drifting and the nose has also swung, correct the heading first, because a heading change shifts your whole view.
Building the hover in stages
Move to each stage once the current one feels reliable:
- Hold position over the pad.
- Hold position and heading together.
- Turn slowly on the spot in quarter turns, pausing at each.
- Move slowly sideways and backwards, then stop.
- Lift off, depart and fly a circuit.
A good early target is holding position within the pad for 30 seconds.
Wind. A steady headwind makes hovering easier, because the rotor gains some of the clean-air benefit even when the helicopter is stationary over the ground. Calm air needs the most power. A tailwind makes the helicopter want to weathervane and is the most demanding. Start with calm conditions or a light headwind, then introduce crosswinds and tailwinds as your skills develop. Bear in mind that a hover that works at a cool, sea-level airfield may need more power than is available at a hot, high helipad, because thin air reduces performance. Density altitude is worth studying separately.
Stage 4: Transitions to and from the hover
Departing the hover
As you push the cyclic forward, the rotor's lift tilts forward and less of it supports the helicopter. Until you reach effective translational lift, the helicopter will tend to sink, so add a little collective as the cyclic goes forward, and accelerate gently.
Passing through effective translational lift, you'll feel a shudder, and the helicopter will tend to climb and pitch nose-up on its own, often with a little roll. Allow it to climb slightly, and keep the nose low enough to continue accelerating.
Approaching to the hover
The approach is the same transition in reverse. A normal helicopter approach is noticeably steeper than the 3 degree glideslope used by aeroplanes. As you slow through about 20 knots near the end, add collective to offset the loss of translational lift, together with the matching pedal. Keep some forward speed until you're close to the ground. A slow, steep descent with power applied can lead to vortex ring state, where the helicopter descends into its own downwash. That condition and its recovery are worth studying on their own.
Touchdown
At touchdown, sideways drift matters more than sink rate. A skid that contacts the ground while the helicopter is moving sideways can act as a pivot, and the helicopter can roll over it, a condition called dynamic rollover. Bring all sideways movement to a stop, then settle gently onto the surface.
Troubleshooting reference
| What you see | Likely cause | Adjustment |
|---|---|---|
| Nose swings on lift-off | Collective raised without matching pedal | Raise the collective slowly and add pedal as you go |
| Helicopter climbs and yaws immediately at the start of a flight | Collective axis reversed | Check axis direction in the controls menu |
| Rocking that builds with each correction | Inputs too large for the cyclic's delayed response | Smaller inputs, made earlier, then neutralise |
| Sideways drift with the stick centred | Translating tendency, plus spring centring | Hold a small sideways input; use cyclic trim if available |
| Stable hover low down, sinks when higher | Climbed out of ground effect | Hover at a few feet |
| Hover turn climbs or descends on its own | Pedal input changing power demand | Small collective adjustment with each pedal input |
| Sinks when moving forward from the hover | Lift tilted forward before translational lift | Add a little collective as the cyclic goes forward |
| Climbs and pitches up after take-off | Effective translational lift | Keep the nose down and continue accelerating |
| Sinks at the end of the approach | Translational lift reducing as speed drops | Add collective and pedal as you slow through about 20 knots |
| Rolls at touchdown | Sideways drift when skids contact the ground | Stop all drift before settling |
If the helicopter feels too responsive, the cause is usually the cyclic's delayed response combined with drift being spotted late. Smaller, earlier inputs tend to help more than extra sensitivity, additional assists or a higher hover.
Using the simulator's strengths
The simulator offers two tools a real student doesn't have:
- Replay. Watch a hover from outside to see exactly when a swing began, and whether the input came late or was larger than needed.
- Repositioning. Practise one transition repeatedly, such as accelerating through translational lift and slowing back down ten times in ten minutes, which would be costly and tiring in a real helicopter.
Short sessions of 10 to 15 minutes, spread over several days, are particularly effective. Measure progress across sessions: a week of steadily reducing drift and height variation is a reliable sign of skill development. When reviewing touchdowns, sideways and forward drift are more informative than vertical speed. Tools and metrics built around aeroplane landings, with flares, glideslopes and threshold speeds, don't describe a good helicopter arrival.
How simulator skills transfer
Many skills carry over to real helicopters: understanding how the controls interact, pedal with collective as a reflex, maintaining speed and avoiding slow steep descents, approach and departure profiles, and familiarity with start-up sequences.
Hover feel transfers less directly. A real pilot senses the hover largely through the seat, while a simulator pilot relies on visual cues, and real helicopter pilots often say the simulator hover feels different from the real thing. A few habits are worth being aware of if you plan to fly for real: relying on the spring to centre the stick, input sizes scaled to a joystick, dependence on assists or the external view, and the timing of emergency procedures.
Autorotation, the technique for landing without engine power, is a good example of the last point. In light helicopters with low-inertia rotors, the collective must be lowered almost immediately after a power loss, and a simulator may tolerate a slower reaction than a real aircraft would. Autorotation and the height-velocity diagram, which shows the combinations of height and speed that allow recovery from an engine failure, are both worth studying in detail.
Simulator time builds familiarity with theory, procedures and the order of operations, which is valuable preparation, though it doesn't replace real hover training.
Your first session
Start at 1,000 feet with plenty of space around you. Raise the collective, watch the nose, and find the pedal input that keeps it steady. That reflex is the foundation for everything that follows.