
Pattern Work: Flying a Proper Circuit in MSFS (and Judging Every Lap)
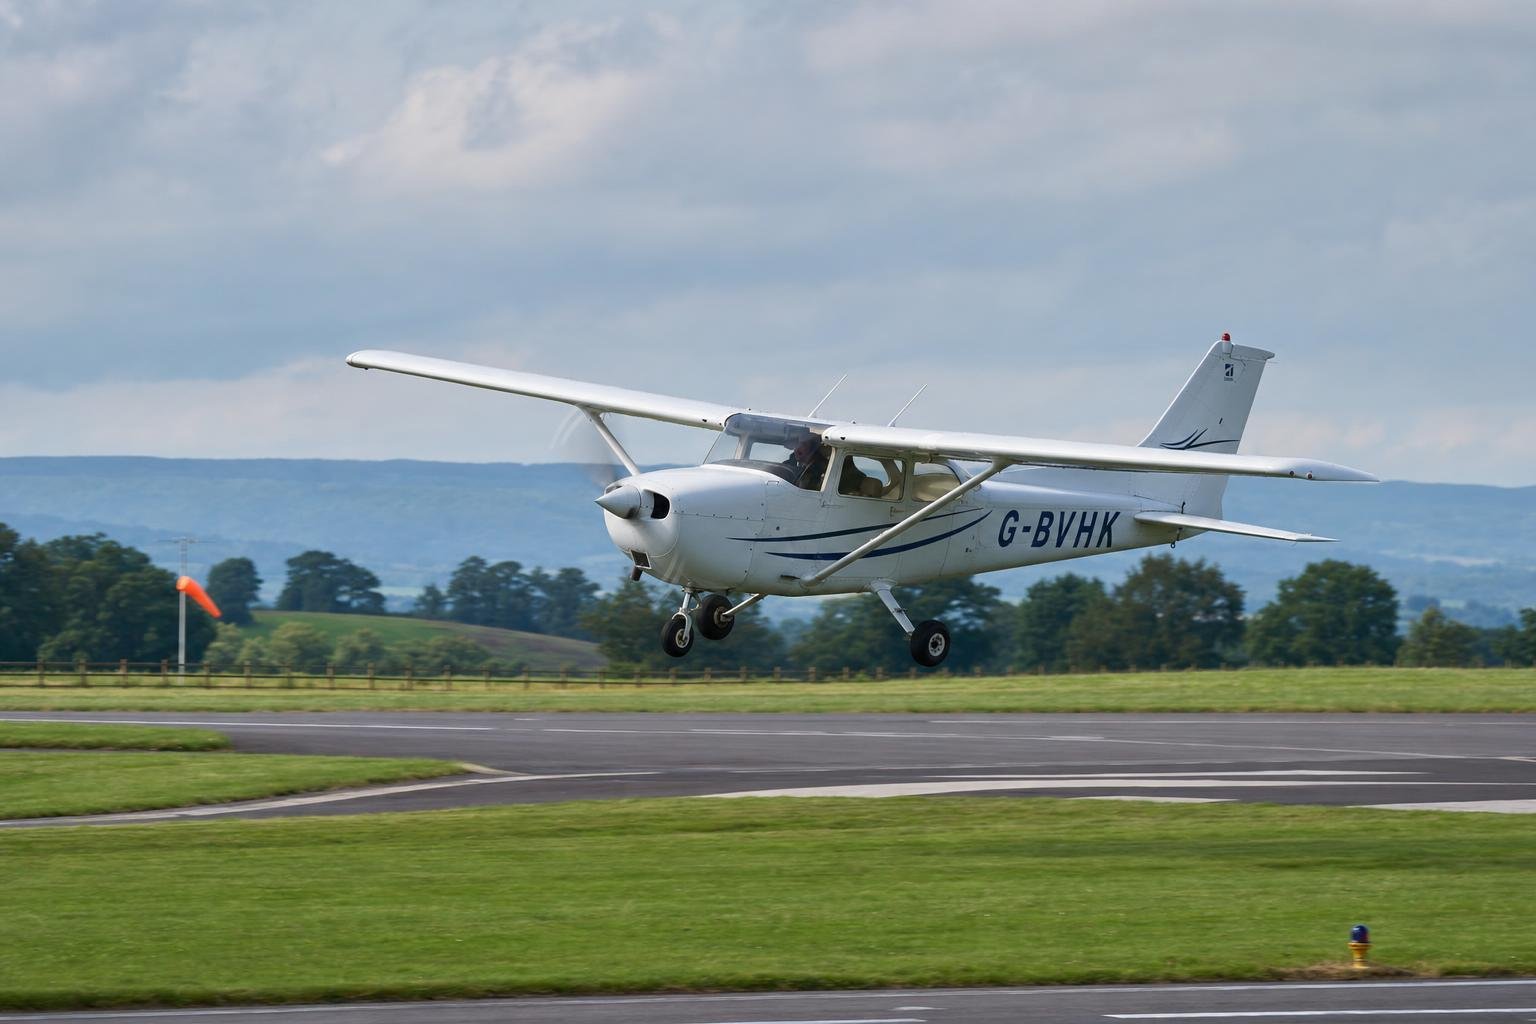
The traffic pattern gets treated as a formality in desktop simulation. The shape you fly at the start and end of the interesting part. That's backwards. A circuit is a landing every five or six minutes, flown under conditions you control completely, and it's the highest-density landing practice that exists on any platform, real or simulated. Yet most simmers who want to fix their landings do it by flying long straight-in ILS approaches, which trains needle-tracking and autopilot monitoring while the actual skill, judging energy visually from downwind to touchdown, goes unpractised.
If your laps come out a different size every time, if you can't tell whether a bad landing was caused in the flare or ninety seconds earlier abeam the numbers, or if the real-world visual cues from PPL videos ("turn base when the threshold is 45 degrees behind the wing") stubbornly refuse to work on your monitor, this is the article. In it I'll cover how to fly a repeatable circuit, how the technique changes at a desk, and how to judge every lap so that repetition becomes improvement rather than a hundred rehearsals of the same mistake.
Why the circuit beats everything else for landing practice
Instructors don't use the circuit because it's a legal shape around an airfield. They use it because it's a standardised experiment. Every lap presents the same runway, the same wind, the same aircraft at nearly the same weight, and asks you to solve the same energy problem. Hold everything constant, change one thing at a time, and the landing at the end of each lap is the measurement. When the conditions are identical and the outcome varies, the variable is you, and that's precisely the information you need.
The density argument is just as strong. A GA circuit takes roughly five to six minutes, which is around ten landings an hour. A full A-to-B flight gives you one landing, flown at the end of the sortie when you're least fresh, at an airport you may never see again, in weather you didn't choose. Most simmers have a high lifetime landing count and almost zero deliberate landing practice, because a landing at the end of a two-hour flight is an event, not a rep.
There's a caveat that the rest of this article exists to address. Repetition without measurement grooves errors exactly as efficiently as it grooves skill. A pilot who flies a hundred unexamined circuits with a descending downwind has practised descending on downwind a hundred times, and is now very good at it. Volume is not the target. Measured, varied repetition is.
The circuit, leg by leg, with the numbers that make it repeatable
The standard pattern is left-hand (all turns to the left), flown at 1,000 ft above the airfield for piston GA and typically 1,500 ft for turbines and larger aircraft. Both figures are guidance, not law. Airports publish non-standard altitudes and directions, and the chart wins. Note that pattern altitude is above ground level, so at a 5,000 ft-elevation field you're flying the circuit at 6,000 ft MSL, with the climb performance to match.
The legs, for a Cessna 172 as the reference type (speeds are approximate and vary with weight and flap).
Upwind (departure). Climb straight ahead on the extended centreline. Don't turn early. A curved departure leg makes every subsequent leg unrepeatable.
Crosswind. Turn 90 degrees when you're within about 300 ft of pattern altitude, which at a standard field means roughly 700 ft AGL, or two-thirds of the way up. That rule exists for a reason worth knowing. It means you finish the climb and level off on downwind, wings level, rather than trying to capture an altitude mid-turn. If you turn crosswind at pattern altitude instead, you arrive on downwind still cleaning up, and the abeam point catches you unconfigured.
Downwind. Parallel to the runway, opposite the landing direction, at pattern altitude and roughly 90 kt. The single most important moment of the entire circuit is the point abeam your intended touchdown point. Power back (around 1,700 RPM in a 172 works as a starting value to calibrate), first stage of flap, pre-landing flow, and re-trim. Everything from abeam to touchdown is one continuous energy problem. Arrive at the abeam point high or fast and you'll pay for it ninety seconds later in the flare, which is why analysing only the touchdown so often misdiagnoses the fault.
Base. Turn 90 degrees towards the runway when the threshold sits about 45 degrees behind your shoulder. Descend at around 80 kt with second-stage flap. The geometry of that 45-degree cue isn't arbitrary. It produces a base leg long enough to lose roughly 500 ft at about 500 fpm before the final turn. Once you know that's what the cue is for, you can derive your own turn point for any aircraft and any speed, which matters at a desk, as I'll get to.
Final. Roll out on the extended centreline at about 500 ft AGL, full flap as required, 65 to 70 kt. A 3-degree path loses about 300 ft per nautical mile, and the descent rate it needs is your groundspeed times five. At 65 kt that's only around 330 fpm, which is why a light-aircraft final feels much flatter than a jet ILS and why simmers who trained on airliners tend to dive at it.
That gives you a three-gate self-check you can apply every single lap.
| Gate | Where | Target |
|---|---|---|
| 1 | Abeam the touchdown point | Pattern altitude, approach speed + ~10 kt, first flap in, trimmed |
| 2 | Base turn complete | Pattern altitude minus 200 to 300 ft, descending, second flap |
| 3 | Final turn complete | ~500 ft AGL, on centreline, on speed |
Treat these as rules of thumb to calibrate to your aircraft, not gospel. Their value is diagnostic. A bad landing preceded by a busted gate 1 is not a flare problem, whatever the flare looked like.
Bank angle in the pattern is conventionally kept to 20 to 30 degrees, and the base-to-final turn is where that convention earns its keep. Stall speed rises with bank because the wing must produce more lift in a turn. Roughly 7 per cent higher at 30 degrees, about 19 per cent at 45, and around 40 per cent at 60. At 65 kt on base you don't have much margin to spend steepening a turn to salvage an overshoot. More on that failure mode below.
One wind rule is worth carrying into every circuit. Add half the gust factor to your approach speed. Wind 10 gusting 20 means flying final about 5 kt faster than the book figure.
Flying it on the simulator
The 45-degrees-behind-the-wing cue assumes you can turn your head and use peripheral vision. Downwind spacing cues like "put the wingtip halfway up the strut" assume a fixed, known eyepoint. Neither survives a monitor unmodified.
If you fly with head-tracking or VR, you can fly the real technique, and you should. Turn your head, find the threshold over your shoulder, use the real cue. VR restores enough depth and periphery that most of this section doesn't apply to you.
If you fly on a fixed monitor, stop pretending and fly a numbers-based circuit. The substitutes for the over-the-shoulder base cue are these.
- The stopwatch. From abeam the threshold, fly roughly 30 to 45 seconds before turning base, in nil wind at 172 speeds. Treat that as a starting value and calibrate it. If your finals keep coming out at 400 ft instead of 500, add a few seconds. Then adjust for wind, roughly a second per knot of headwind on final (a headwind on final is a tailwind on downwind, carrying you further from the field per second).
- The ground track. If your sim or nav display shows a track line, use it to hold the downwind parallel and judge the turn.
- A landmark. Pick a ground feature abeam the turn point. Cheap and effective, but it only works at that airport, which defeats part of the purpose.
The timing method has one silent failure mode. It measures time, not distance. On a day with a strong tailwind on downwind, 40 seconds carries you much further from the field, and the untimed pilot turns "on schedule" into a rushed, low base. If your gates are busted only on windy days, the wind ate your base leg. The clock didn't fail, the assumption behind it did.
Two more desk-specific traps. First, field of view. Spacing cues are relative to your eyepoint, so two simmers with different FOV settings following the same wingtip cue fly patterns half a mile different in width, and a wide FOV compresses depth so the runway on base looks further away than it is, biasing you towards a late turn. Pick a camera position and FOV, save it, and never change it, because every judgement you calibrate is calibrated to that picture. Second, trim. A spring-centred yoke gives no force cue that you're out of trim, so a mistrimmed downwind is invisible right up until your hand comes off the yoke to reach for the flap lever and the nose drops. Re-trim abeam, every lap, as a flow item rather than a reaction.
Frame rate deserves a mention because circuits live exactly where it suffers. Low altitude, dense scenery, repeated passes over the same airport. A stutter in the flare is a different failure from a judgement error, and it leaves a different signature (a sudden uncommanded-looking deviation rather than a developing trend). Learn to tell them apart before blaming your technique, and if your airport of choice stutters on short final, practise somewhere lighter.
Finally, ATC. Default MSFS ATC will clear you for "the option" and mutter about downwind entries, and its AI traffic flies patterns of enormous size. Treat it as scenery. It won't teach you circuit geometry, and following AI traffic will teach you the bomber pattern described below.
Joining the pattern: three geometries, depending on whose YouTube you watched
Simmers fly worldwide and copy tutorials from whichever country produced them, so it's worth knowing that pattern entry is not one procedure. Radio calls in the pattern are a subject of their own. The geometry is what matters here.
| Regime | Standard entry | Shape |
|---|---|---|
| USA (FAA) | 45-degree entry to mid-downwind | Approach the downwind leg at 45 degrees, at pattern altitude, joining abeam the midpoint |
| UK (CAA, typical) | Overhead join | Arrive overhead at typically 2,000 ft above the aerodrome, descend on the dead side (the non-circuit side), join crosswind at circuit height |
| ICAO / much of Europe | Downwind or base join | Join directly onto downwind at circuit altitude, as instructed or published |
The UK overhead join confuses everyone who first meets it, and its logic is that it lets you inspect the field and the signals square from above before committing. Whichever regime your airfield sits in, fly its published entry. In the sim it costs nothing and it's free procedural practice, and non-standard patterns (right-hand circuits, terrain-constrained shapes, odd altitudes) exist in the sim exactly as charted.
Where laps go wrong, leg by leg
These are the recurring failures, with what each looks like from the seat and what evidence it leaves.
The ballooning pattern. Each lap slightly wider and higher than the last, because you're unconsciously using the previous lap as your reference instead of the runway and the numbers. Invisible lap to lap, unmistakable across ten. This is the failure that only measurement catches, because your memory of lap three is gone by lap eight.
The bomber pattern. A downwind flown so wide that final becomes a two-mile straight-in, quietly converting your circuit session back into the ILS-style approach you were trying to escape. The symptom is that your final leg takes over a minute and you're stabilised with time to spare, every lap. The practice value lives in the compressed judgement of a proper-sized circuit, and a huge one launders it away.
Descending on downwind. Power comes back abeam, the aircraft isn't re-trimmed, your eyes are outside judging the turn point, and 100 ft leaks away before base. Shows up as a low gate 2, and everything after it is a scramble.
Overshooting final. A tailwind component on base sweeps you through the extended centreline, the instinctive correction is to steepen the bank and, when that's not enough, to skid the turn with rudder. In a real aircraft this is the base-to-final stall-spin scenario that kills people. The sim under-punishes it, because a spring yoke transmits no lightening of control force, there's no buffet through your hands, and no seat-of-the-pants sensation of the skid. You get the numbers of the skidded turn without the feel of it. The correct response is the same in both worlds and needs practising until it's reflexive. Don't steepen past 30 degrees, and if you've blown through the centreline, go around and reset. Go-around technique and decision-making is its own subject, but the decision itself belongs in every circuit session.
Chasing speed on final with pitch alone. You're fast because gate 1 was fast, you pitch up to fix it without touching power, and you arrive over the threshold carrying 10 kt you can't land with. The evidence is a long float and a threshold speed well above VRef, and the cause was the abeam power setting two minutes earlier, not the flare. This is the clearest example of why judging only the touchdown misleads. The flare was fine, given what it was handed.
The salvaged lap. A bad downwind rescued by heroics on short final feels satisfying and teaches exactly the wrong thing. Rescue skills instead of circuit skills. In a real aircraft a go-around costs fuel and time, so salvage has some justification. In a sim the lap is free. Go around, reset the experiment, and keep the data clean.
Judging every lap
The metric that matters across a circuit session is scatter, not score. Five landings at 180 to 220 fpm is better flying than one 90 fpm greaser sitting among four 400 fpm arrivals, because consistency is what professional flight-data monitoring actually looks for, and consistency only exists across many flights. The same goes for chasing minimum touchdown rate at all. "Butter" optimises the last two seconds of a six-minute exercise and actively rewards floating half the runway, which real operations penalise. Touchdown point and threshold speed consistency are the better targets, and the flare and touchdown-rate scoring in depth is its own article.
The trouble is that nobody can hold ten laps in their head. By lap six you can't remember whether lap two's firm arrival followed a high abeam point or a late flare, and the trend that would tell you your abeam power setting is systematically 100 RPM too high is invisible in any single lap. This is one place where the simulator has an outright advantage over real training. It knows your exact ground track, your altitude on every leg, your threshold speed against VRef, your precise touchdown rate. A real student gets an instructor's impression. You can have data.
This is what I built My FS Flights for. Its companion app logs every lap in the background with no manual entry, breaks each circuit into scored stages, and produces a landing report per touchdown covering touchdown rate, threshold speed against VRef, centreline and glideslope tracking, and the rollout, so the lap-by-lap diagnosis this article describes happens automatically. Its stabilised-approach badge checks gear, flaps, sink rate, glideslope and centreline by 1,000 ft, which in a 1,000 ft pattern is a demanding standard. You start descending at 1,000 ft, so meeting the gate means configuring on downwind, which is exactly what good circuit discipline is. The gate and the circuit teach the same lesson from opposite ends. And since every lap includes a takeoff, ten takeoffs an hour get scored too. Rotation-speed consistency is as measurable as touchdown rate, and nobody practises it deliberately.
Whether you use a platform or a notebook, the questions to ask of a session are the same. Is my touchdown-rate scatter shrinking? Is my threshold speed consistently above VRef (abeam power setting wrong) or only sometimes (technique inconsistency)? In a right crosswind, do I always touch down left of centreline (a technique diagnosis, and a pointer towards crosswind landing technique proper) or just once (a bad lap)? One lap can never tell you whether you're improving. Ten logged laps tell you the direction of every one of those trends.
Drills: what to actually fly
The motor-learning research on skill acquisition points the same way as instructional experience. Varied practice beats identical repetition for retention, and short frequent sessions beat marathons. Ten laps twice a week does more than forty laps once a month. Structure sessions accordingly.
The one-variable ladder. Ten laps, changing exactly one thing per lap. Flap setting, wind, weight, pattern direction. Identical laps groove a habit, while varied laps build a skill that survives contact with a new airport.
The crosswind escalator. The same circuit at 0, 5, 10 and 15 kt of crosswind in one session, wind set identically each time via a weather preset. No flying school on earth can schedule this progression. You can fly it on a Tuesday evening. It's also, quietly, the best wind-drift trainer available. Dial 15 kt across the downwind and watch what it does to your ground track, something early real-world students never get to isolate.
The power-off 180. Abeam the numbers, throttle to idle, make the runway. This is the energy-judgement exercise in its purest form, a commercial-standard manoeuvre in its own right, and one a rental aircraft rarely lets you hammer at. The sim gives you unlimited attempts.
The mirror drill. Alternate left- and right-hand circuits. Everything a monitor pilot memorised as screen positions mirrors, which exposes brutally whether you learned the geometry or just the picture. If your right-hand circuits fall apart, you learned the picture.
The no-instrument lap. One lap flying the visual picture alone, ignoring the ASI and altimeter, then check the recorded data against your impression. This calibrates your eyes against reality in a way real flying can never safely do.
Reposition-to-downwind reps. Slew or reposition to mid-downwind to isolate the base-final-landing segment. Useful in moderation, but cap it. Skipping the takeoff and upwind also skips the trim and configuration work where half the failures originate, and a session of nothing but finals drifts back towards being approach practice rather than circuit practice.
One structural rule across all of them. When a lap goes bad early, go around rather than salvaging. A rescued lap contaminates the data and trains the wrong skill.
What transfers to a real cockpit, and what does not
Worth being straight about, since some readers are working towards a licence.
The procedural layer transfers almost entirely. Circuit discipline, flows, gate-checking, wind-correction geometry, the habit of configuring by the abeam point. This is knowledge, not motor skill, and it arrives in a real cockpit intact.
Two things don't transfer, and one is actively a crutch. The timing-based base turn is a desk workaround for missing peripheral vision, and carried into a real aircraft it substitutes a stopwatch for exactly the visual judgement your instructor is trying to build, so flag it to yourself as scaffolding to be dropped. And the sim can't teach the feel of the base-to-final skid, because there are no control forces and no vestibular cues to feel. It can teach you the numbers and the correct response cold, which is worth a great deal, but the seat-of-the-pants warning that saves real pilots has to be learned in a real seat. Say that to your instructor before they discover you flying beautiful, slightly mechanical circuits.
There's also a habit worth not building. Rushed touch-and-goes. Reconfiguring flaps and trim in a three-second ground roll teaches hurry, which is why real schools increasingly prefer stop-and-goes, and the sim removes even the touch-and-go's original justification (saving taxi time and money). Land, stop, breathe, look at what the lap produced, and reposition or backtrack for the next one.
The next session is simple enough to fly tonight. Ten laps at one airport, camera position fixed, the three gates checked out loud on every lap, one variable changed per lap, and every touchdown recorded somewhere you can see all ten side by side. The tenth lap won't be your best one, but the ten together will tell you something no single landing ever has.